Quick Start
Create DAW Project
Before we begin using MoveMusic, let's setup our DAW music software so we can make sound. First, make sure MMConnect is open and the MoveMusic VR app is properly connected as explained in Initial Setup. Then create a new DAW project and add a few MIDI tracks with some virtual instruments. Finally, enable one of these tracks to receive MIDI input so we can hear it while using MoveMusic.
Add Control Objects
MoveMusic Control lets you create complex control layouts by building up from basic objects. Let's add some objects to your MoveMusic project and then we'll explain how they work.
To add an object to the scene, click the button with the plus icon ![]() (A button) on the right-hand controller. To select the next object type you want to add, click the Object Type menu button
(A button) on the right-hand controller. To select the next object type you want to add, click the Object Type menu button ![]() (B button) on the right-hand controller and select an option from the menu. You can hide this menu by pressing the same button.
(B button) on the right-hand controller and select an option from the menu. You can hide this menu by pressing the same button.
Basic Object Types
- Hit Zones can be hit to send MIDI Notes or CCs.
- Morph Zones are spaces you can move your controller through to send MIDI CCs. They can take the form of sliders, XY pads, or 3D XYZ cubes. Hold down the trigger button on your controller to use a Morph Zone.
- Text Labels are simple 3D text objects to help you label your layout.
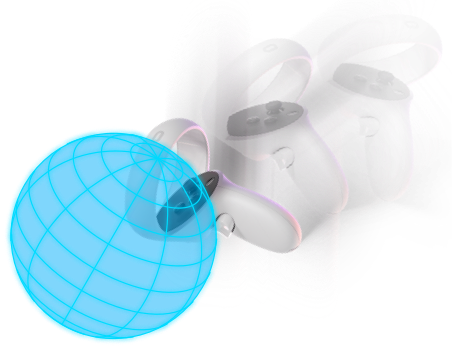
Hit Zone
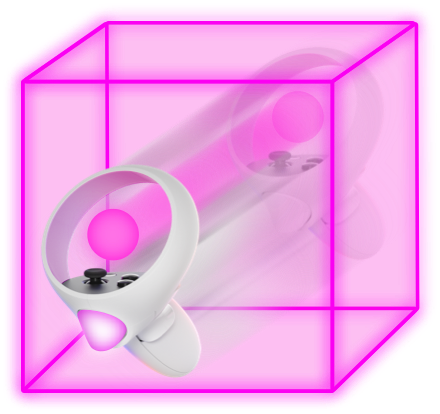
Morph Zone
Position, Resize, & Delete Objects
To move an object, press and hold the grip button while your controller is near the object, move your controller where you want the object to be placed, then let go of the grip button. You can resize an object by grabbing it with both grip buttons and pulling your hands apart to make it larger or pushing together to make it smaller. To delete an object, grab and hold it, then press the contextual delete button ![]() (Y or B button) that has appeared on your gripping controller.
(Y or B button) that has appeared on your gripping controller.
Edit Objects with the Inspector
Objects can be configured using the Inspector menu. Open the Inspector menu by pressing the edit button ![]() (X button) on the left-hand controller. You can hide this menu by pressing the same button. With the Inspector open, grab any object you want to edit and the Inspector will display its settings. You can scroll through settings by moving either controller thumbstick down or up.
(X button) on the left-hand controller. You can hide this menu by pressing the same button. With the Inspector open, grab any object you want to edit and the Inspector will display its settings. You can scroll through settings by moving either controller thumbstick down or up.
Play Drums with Hit Zones
Let's play some drums! In your DAW, add a MIDI track with drum samples and enable it to receive MIDI input. Now in MoveMusic, try hitting the first Hit Zones you created. If you don't hear the drum sounds yet, open the Inspector and set the proper MIDI Note numbers for your DAW's MIDI track.
Control Effects with a Morph Zone
Let's use a 2D Morph Zone (XY Pad) to control a filter audio effect. Create a Morph Zone, open the Inspector, and set the "Dimensions" to be 2D. Now the Morph Zone should appear as an XY Pad. In your DAW, add a filter audio effect to the drum track we made earlier. Now we can use the MIDI Mapping feature in our DAW to assign the X-axis of the Morph Zone to control the filter's frequency parameter and the Y-axis to control the resonance parameter. Enable MIDI mapping mode in your DAW, then click on the frequency parameter of the filter audio effect. Back in MoveMusic, open the Inspector for our 2D Morph Zone and click the solo button ('S') for the "X Dimension" MIDI CC. Then bring your controller inside the Morph Zone and press and release the trigger button to map the X-axis to the frequency parameter you clicked on earlier. Now in your DAW, click on the resonance parameter. Back in MoveMusic, solo the "Y Dimension" MIDI CC and click the trigger button in the Morph Zone to map the MIDI. Now go back to your DAW and exit MIDI mapping mode. Now when you press the trigger button in the Morph Zone and move around you should be able to control the filter. Try hitting the drum Hit Zones you made earlier while morphing the filter!
Save Your Project
Let's save our MoveMusic Project so we can reopen it later. Press the menu button on the left-hand controller to open the MoveMusic app menu. You can hide this menu by pressing the same button. Make sure you have the "Project" tab selected in the bottom floating window. At the top of the main window, click in the "Project Name" text field to name the project, then click the "Save Project" button to save the project. Your new project should now appear in the "Recent Projects" section and you can also find your project in the full list by clicking "See All Projects".
To learn about more features of MoveMusic, check out the articles in our User Guide like the guide to Selection & Grouping