Initial Setup
1. Install MoveMusic Control VR
On your Meta Quest VR headset, search for “MoveMusic Control” in the store. After purchasing the app, you will be able to install it and find it in your app library.
Optional Tutorial
After opening the VR app you will see a welcome screen. Press the button, "Learn Controls", to learn the basic controls of the VR app. You can bypass the tutorial by pressing "Start Empty Project" and later reopen the tutorial by going to the MoveMusic app menu ➜ Settings Tab ➜ Scroll to the bottom ➜ Press "Learn Controls".
2. Install MMConnect on Your Computer
To connect the MoveMusic VR app to your computer, download the MMConnect app via the links below. After unzipping the download file, you can place the MMConnect app in your Applications folder or wherever you would like. Then, launch MMConnect.
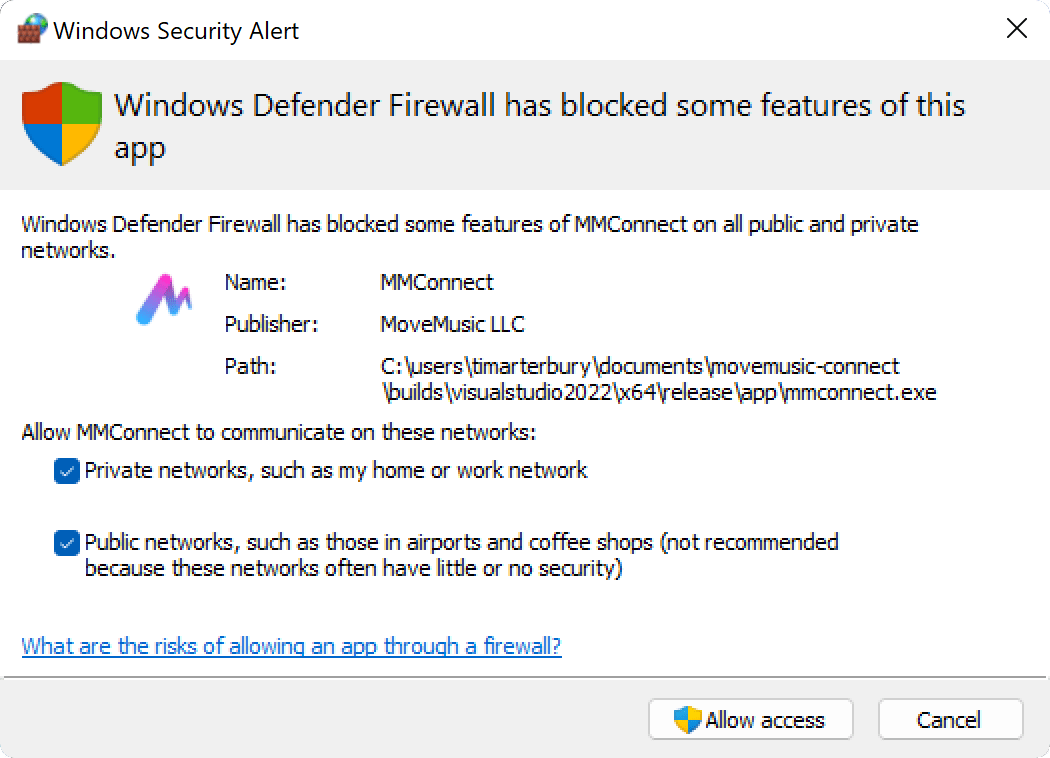
Windows Firewall Prompt
The first time you open MMConnect on Windows, it will prompt you to allow MMConnect to communicate through the firewall. Please check both boxes and click "Allow access" to allow MMConnect to communicate with your VR headset on private and public Wi-Fi networks.
3. Setup Wi-Fi Connection
You need to connect your computer and VR headset to the same Wi-Fi network.
For the fastest Wi-Fi connection (macOS and Windows only), we recommend broadcasting a direct Wi-Fi hotspot from your computer using MMConnect's Wi-Fi Direct Hotspot feature. To do this in the MMConnect app:
- Click "Configure" to choose a Wi-Fi name/password.
- Click the switch next to "Wi-Fi Direct Hotspot" to turn on the Wi-Fi hotspot from your computer.

Next, ensure MMConnect shows “Listening On” in the top status bar, and follow the steps listed near the top of the MMConnect app. The app will prompt you to:
- Go into your VR headset's Wi-Fi settings and connect to the Wi-Fi network that was listed in MMConnect.
- Open the MoveMusic app in your VR headset, go to the main menu by pressing the menu button on the left-hand controller, select the “MMConnect” tab at the bottom, click “Find Connection”, and select your computer's name from the list.
You can test if your connection worked by creating a Hit Zone in the VR app by pressing the button with the plus icon ![]() (A button) on your right-hand controller. When you move in and out of the Hit Zone with your controller, you should see that messages appear in the MMConnect app on your computer in the “Message Log” section.
(A button) on your right-hand controller. When you move in and out of the Hit Zone with your controller, you should see that messages appear in the MMConnect app on your computer in the “Message Log” section.
4. Setup MIDI Connection
Lastly, you need to connect MMConnect to your music software so you can make music!
Windows
For Windows, you will need to download another piece of software to create a virtual MIDI port between MMConnect and your music software. We recommend loopMIDI by Tobias Erichsen.
Unzip the loopMIDISetup .zip file you downloaded, then launch the loopMIDISetup.exe installer. At the beginning of the installation, we recommend you check the box that says "Autostart loopMIDI when logging in". Checking this box prevents you from needing to manually launch loopMIDI every time you want to use MoveMusic. Proceed with installation.
After installing, launch loopMIDI and create a new port called “MoveMusic MIDI Port” or any name you want. Make sure you set the loopMIDI app to always be launched at startup.
Next, close and reopen MMConnect on your computer and in the MIDI Output section at the bottom, tick the box for “MoveMusic MIDI Port” or whatever name you gave your virtual MIDI port.
MacOS & Linux
In the MMConnect app, in the MIDI Output section at the bottom, ensure the box is ticked for “Virtual MIDI Output (to DAW)”.
Music Software Settings
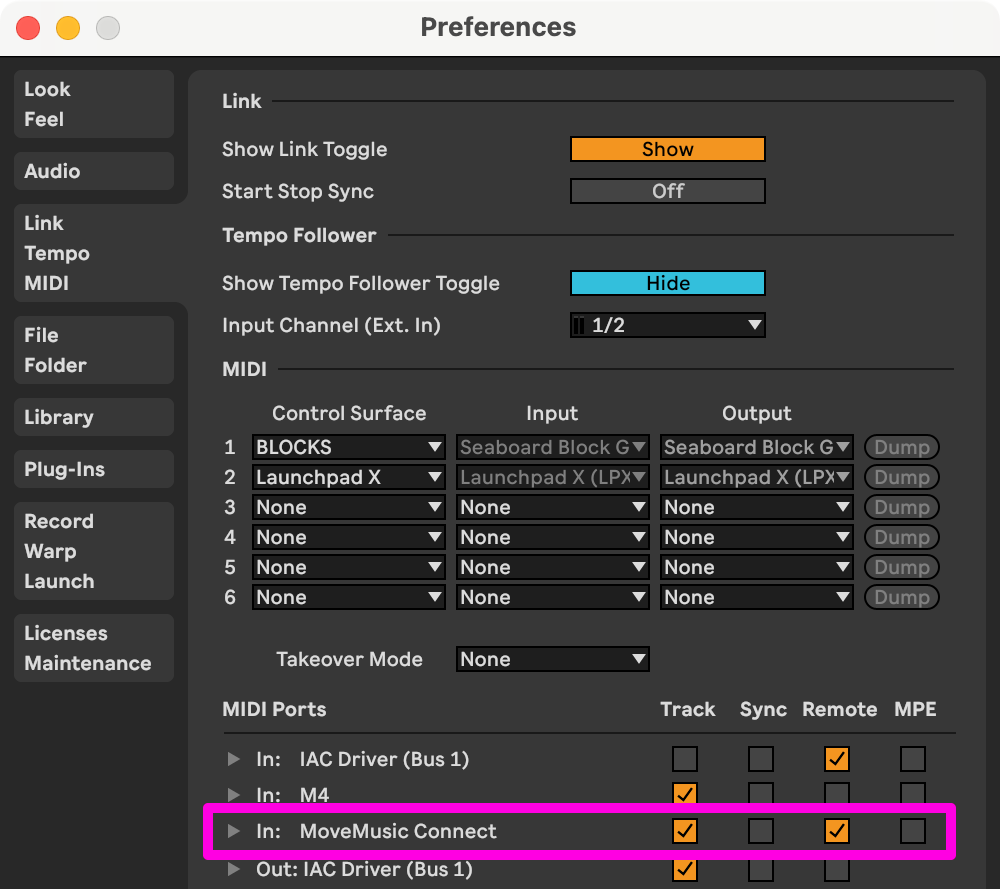
Finally, open your music software of choice, go to the MIDI input settings, and allow MIDI input from MoveMusic. On macOS/Linux, the MIDI port will be called “MoveMusic Connect”. On Windows, the MIDI port will be called whatever you named it in the loopMIDI app. If you do not see the MIDI port, make sure you have MMConnect opened on your computer, and if you are on Windows, make sure loopMIDI is running.
For example, if you are using Ableton Live music software, go to Preferences ➜ Link/MIDI tab ➜ MIDI section ➜ MIDI Ports table ➜ find Input: MoveMusic Connect and make sure “Track” and “Remote” are both set to On.
Everyday Usage
Now that you've got everything installed and connected, you can begin using the MoveMusic VR app to control your music software.
Anytime you want to use MoveMusic in the future, all you need to do is:
- Open the MMConnect app and your music software on your computer. (For fastest connection, turn on MMConnect's "Wi-Fi Direct Hotspot".)
- Set the VR headset to be on the Wi-Fi network listed at the top of MMConnect.
- Launch the VR App (if your Wi-Fi settings have changed, select your computer's connection from the MoveMusic VR connection menu).
To learn how to use MoveMusic, check out the Quick Start